Just realized I had a picture on my phone of the parts before sandblasting:
Friday, March 22, 2013
Free Sandblasting
When I had my frame sandblasted and primed, the guy at the shop offered to blast small parts for free. He could do this easily as he mainly blasts hand railings and he just puts the parts in the bottom of a trough that the railings lay on when blasting and they get hit and cleaned up with the overspray. I took him up on his offer and just got back a box of parts today. Much less work for me! Here they are:
Friday, March 8, 2013
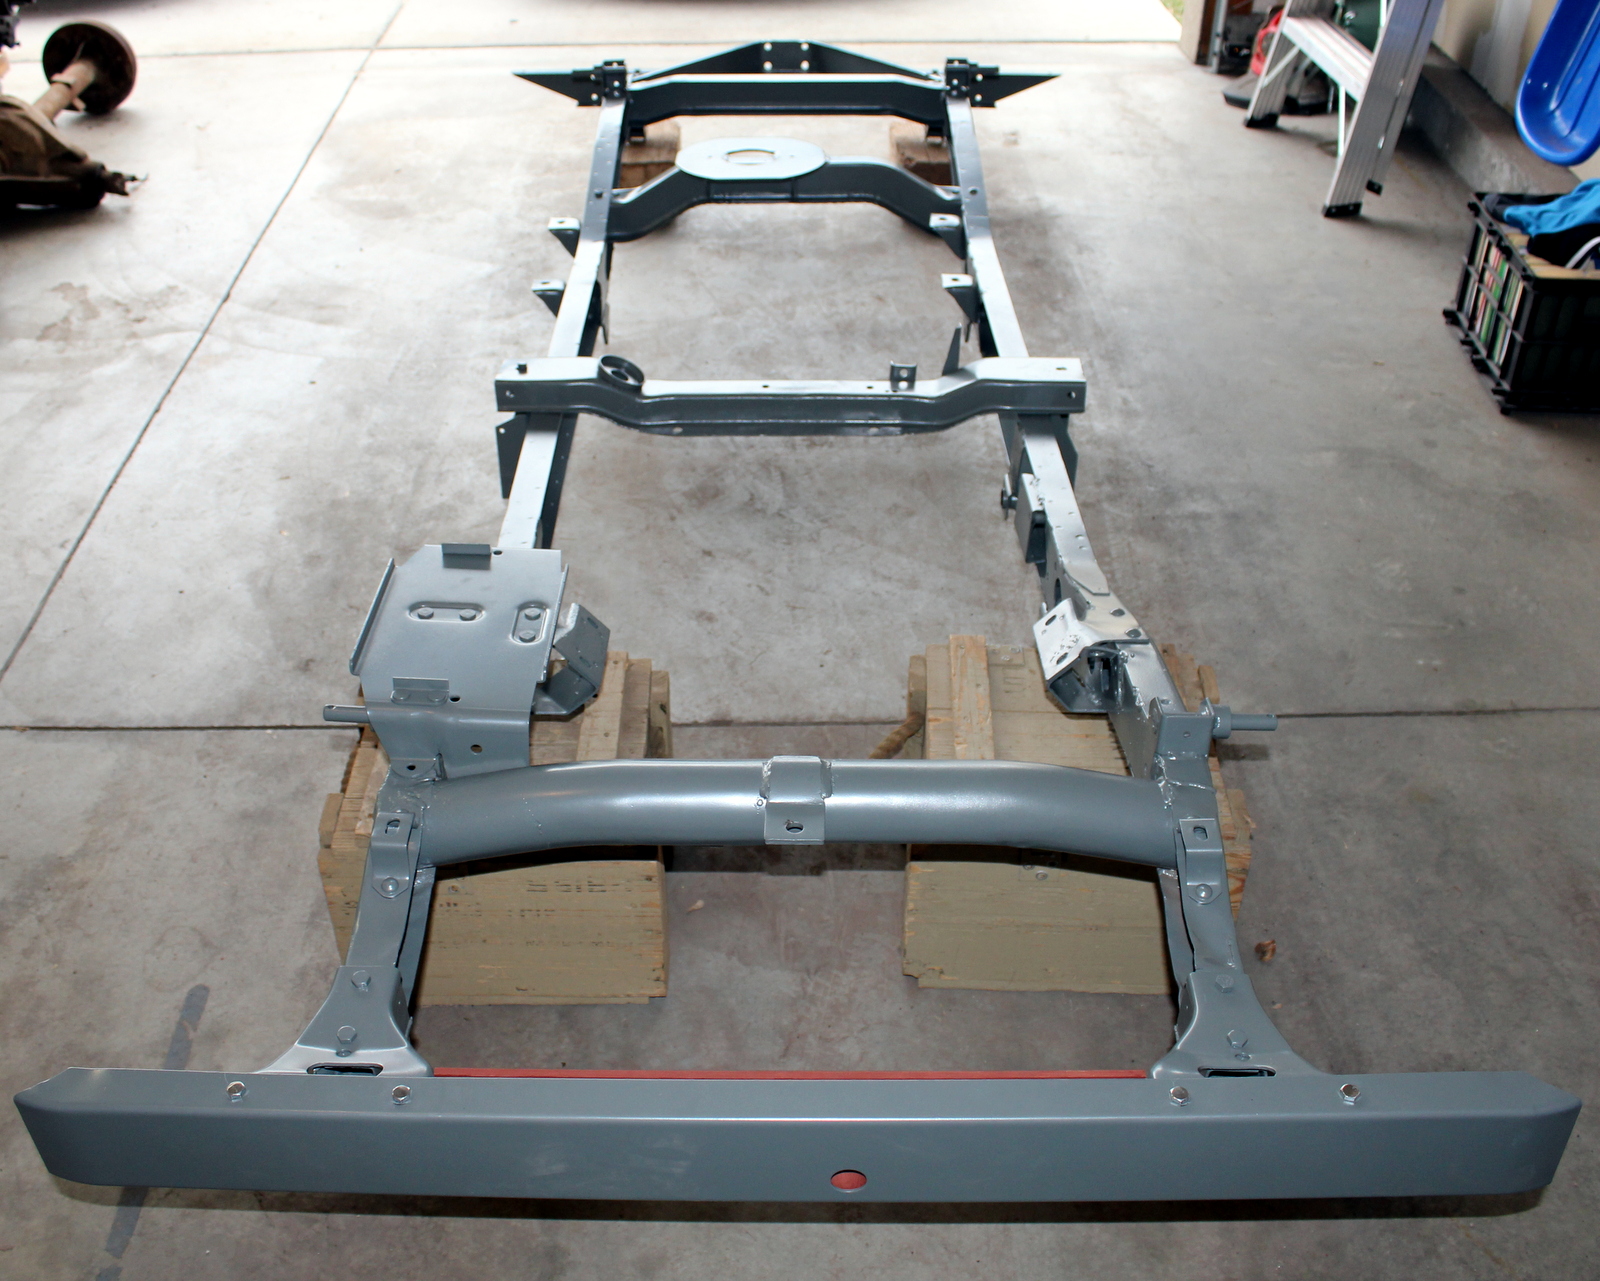
Frame is done!
All repairs to the frame are complete, and I just picked it up today from being sandblasted and primed. It looks great and now I am excited to start bolting stuff back on! Below are some photos of the frame. The red color is the wooden bumper reinforcement that I took out before blasting and priming. The frame went in an oven to cure the primer (oven + wood = burning). I primed it later using red primer from a spray can.
Here's a "before" picture just to compare:
Wednesday, February 27, 2013
Front Axle Housing
The front axle housing is now ready to be reassembled and painted! I just finished the clean-up today, but some of the other parts still need some cleaning before re-assembly. It was a lot of work and difficult to clean with the wire wheel because of all the angles. Thankfully I only have to do this one more time to the rear axle, and it is a little easier to clean. Here it is all shiny (but a little dusty still)!
Saturday, February 23, 2013
The clean up continues...
I thought I would post today just for the sake of posting, since I haven't posted in about 2 weeks. Most of the work lately still involves cleaning up old grease and removing rust and other crud...not terribly glamorous (which is why I haven't posted a lot lately). Most of my work is focused on the axles. I've been pulling the extraneous parts off (for cleaning and inspection) and getting the axles ready for a real mechanic to verify the gears inside are good to go. Here's the front axle in the midst of clean-up:
This is the pile of hubs, brake drums and backing plates that I have removed in anticipation of installing a disc-brake system on the jeep...more to come on that later (hopefully).
Here is the clutch pedal that I cleaned up. It was covered with what appeared to be tar with fine gravel stuck to it. It seems funny to me how a piece of steel can be worn down by the sole of a shoe.
Friday, February 8, 2013
Torque Reaction Spring
I've got my torque reaction spring (TRS) cleaned up, bushings replaced, re-assembled and primed. I think this is the first thing (other than the wheels) ready to go back on the jeep. The TRS is a 'secondary' spring attached below the driver's side leaf spring meant to remedy a handling problem inherent in WW2 jeeps. It's not that big, only about 2 feet long.
Friday, February 1, 2013
Rear axle work
Started work on the rear axle! For now its mostly just cleanup and getting all the old black, thick grease out. It was finally nice enough to do some work outside with the sun shining and temperatures in the mid 40's. Upon opening up the rear differential, I discovered that there is one shattered tooth among the "spider gears" which has resulted in some damage on the teeth on the other gears that it touches as it turns. Luckily I have a spare axle with good gears that I will replace it with. Here is a close up shot. Shattered tooth is on the right with the sun glare on it.
I pulled the ring gear and spider gear assembly out as it will be replaced and so I could better clean out the housing. Here is another shot of the gear assembly. Do you think that perhaps it was made by Ford? If you need some help, look at the bolt heads... :)
Here are another couple pictures of the housing and the gear assembly:
Sunday, January 27, 2013
Ford Transfer Case?
Haven't posted in nearly a week...nothing that interesting to post as I am just doing some clean-up of a few parts here and there, including the rest of the bolts for my other 3 combat wheels.
Weeks ago I had seen the gray paint on the transfer case and the thought crossed my mind that it could possibly be a Ford transfer case but I didn't investigate (for those of you not up on WWII jeep painting, Ford painted their engines gray while Willys painted theirs green). Today while leisurely scrubbing around with the wire brush, I uncovered some "F" marked bolts (for Ford) on the transfer case. So maybe it is a Ford? For the experts out there, where (and how) did Ford mark these, and where should I look for additional markings? There is a number (looks like C18-1) to the right of the F-marked cover bolt which is at the 3-o'clock position in the photo:
Other than that, I found a great powerplant mechanic, so my engine troubles are solved!
Weeks ago I had seen the gray paint on the transfer case and the thought crossed my mind that it could possibly be a Ford transfer case but I didn't investigate (for those of you not up on WWII jeep painting, Ford painted their engines gray while Willys painted theirs green). Today while leisurely scrubbing around with the wire brush, I uncovered some "F" marked bolts (for Ford) on the transfer case. So maybe it is a Ford? For the experts out there, where (and how) did Ford mark these, and where should I look for additional markings? There is a number (looks like C18-1) to the right of the F-marked cover bolt which is at the 3-o'clock position in the photo:
Other than that, I found a great powerplant mechanic, so my engine troubles are solved!
Subscribe to:
Posts (Atom)