Wednesday, May 29, 2013
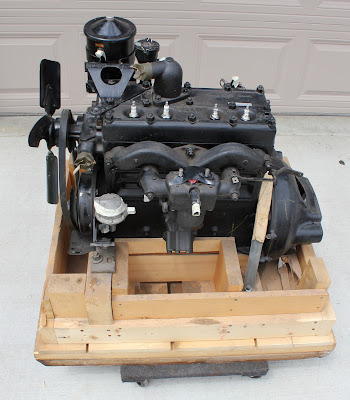
New Old Stock Engine
Today I picked up a rare find: a brand new, never used, still in the box military jeep engine. As it turned out, the old engine needed a complete overhaul and I was able to get this one for less than it would cost to get the old one going again. The sides and top of the box have been removed and I taped over a few openings, but other than that the engine appears as it did when it was boxed up some 50+ years ago.
Monday, May 20, 2013
Ford Transfer Case Discovery
I was just looking over the rebuilt transfer case today when I noticed a script "F" and the letters "GPW" (what Ford named their jeep) cast into it. I hadn't seen this before on the transfer case as the Ford markings I had seen on other cases were in a different location (on the rear by the hand-brake drum). I had looked in that area on my transfer case and not found any Ford markings. Here's a photo of the Ford markings which I found on the front left side:
Saturday, May 18, 2013
Frame Painting Completed
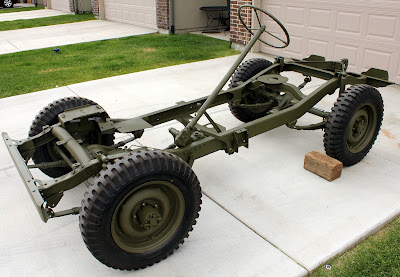
After a long day working on the jeep yesterday, the chassis is now coated in WWII olive drab paint! I think it looks pretty darn good, especially considering the fact that I have never painted anything of this scale before. I also painted the seats, fuel tank, many small parts, top bows, and the underside of the tub (body). This is a big milestone for me and things are coming along! I'll hear from my engine mechanic next week on what he found inside the engine, let's hope for the best.
Thursday, May 16, 2013
Steering and Pre-Paint
The frame is now ready for painting! Hope to get that done over the weekend. Also, I have the steering rebuilt and put back together. It works much better now!
I made a short video as they are a little more interesting:
Here are a few still pictures:
Saturday, May 11, 2013
IT ROLLS!!
I got the axles and wheels all put together today and rolled the jeep out of the garage for the first time since I got it. It was great to see it sitting on its own wheels and rolling easily! Here's a video of the moment (complete with excited kids along for a ride):
Here's a few other shots of the jeep out in the driveway.
Thursday, May 9, 2013
Original Radiator and Fuel Tank Refurbished
I picked up my original radiator and fuel tank from Wayne up at ACME Radiator in Salt Lake City. He does great work! Repairs on the radiator were minimal. Fuel tank was another story as he filled several holes and put a big patch on the rusted out spot, but now it should work as good as new! Most other shops wouldn't even touch it, but he acted like it was just a routine repair. Here's some shots of the radiator:
Here's the fuel tank:
Note the repaired section on lower part of the tank (compare with April 5th post).
Saturday, May 4, 2013
It's starting to look like a jeep again!
Just wanted to post a picture of the progress so far. Its actually starting to look like a jeep again! Cameron likes "driving" it, and grandma decided to eat lunch in it.
Wednesday, May 1, 2013
Disc Brake Update and Transfer Case
Wow! 2 posts in one day! The front axle is now on the frame and I just wanted to show the disc brake conversion as things go together. Here is the bracket which holds the caliper and mounts in place of the drum backing plate:
And here is a shot from the rear with the wheel mounted (and rotor in place - brake caliper is not yet mounted):
Also back from the shop fresh off a rebuild is the transfer case. Wasn't expecting them to have painted/primed it! Looks good, maybe need to replace the knobs (or at least paint them):
And here is a shot from the rear with the wheel mounted (and rotor in place - brake caliper is not yet mounted):
Also back from the shop fresh off a rebuild is the transfer case. Wasn't expecting them to have painted/primed it! Looks good, maybe need to replace the knobs (or at least paint them):
What's wrong with this picture?
Can you see something wrong with this picture? I started to mount my rear axle and leaf springs yesterday. I put the springs on the axle and then when I tried to mount to the frame, the springs were too wide for the frame. I was puzzled for a bit then I realized it: The lower spring bracket/mount which is welded to the axle tube was in the wrong place! It needed to be welded directly below the upper bracket, which is in the correct position. Here's another photo without the spring attached:
At first I thought that someone back in '43 was just in too big of a hurry and installed it incorrectly, but upon closer inspection, I can see traces of the original weld in the correct position. So, at some point, someone moved it for some unknown reason. Yet another unexpected problem to correct...so goes restoration! Here is a comparison with the front axle with the brackets in the correct location:
Subscribe to:
Comments (Atom)


